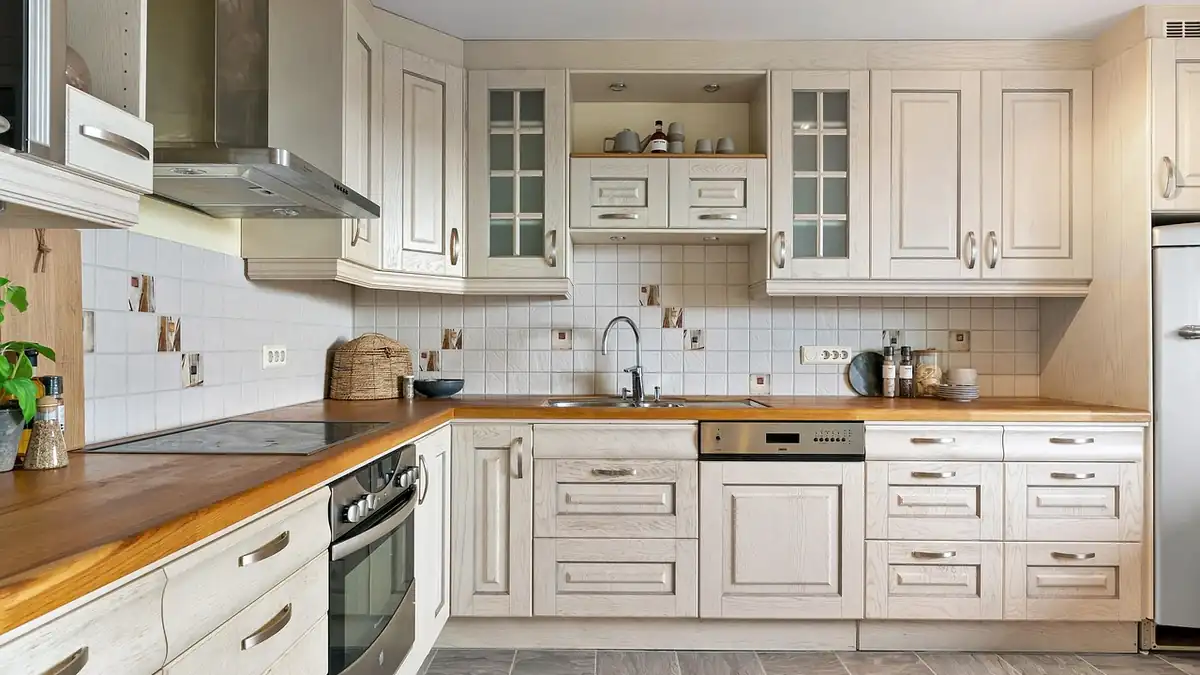
Busy kitchens earn their badges: smoky stir-fries, sambal splatters, oven drips, and the fine mist from air-fryers that slowly settles into a tacky film. In Singapore’s humid climate, that film hardens faster and grabs dust, making cabinets dull and floors slippery. This guide gives you safe, low-fume methods to cut through grease fast—plus a maintenance plan you can actually stick to in a condo or HDB kitchen.
Why kitchens here get greasy so quickly
High-heat cooking styles: Wok-hei, pan-searing, and deep-frying aerosolise oil that coat nearby surfaces.
Humidity accelerates gunk: Moist air helps sticky residues polymerise into a varnish-like layer that’s harder to remove.
Ventilation limits: Short duct runs, recirculating hoods, and compact kitchen footprints mean more residue stays indoors.
Tip 1: Build a safe-but-strong degreasing kit
Primary cleaner: A quality citrus or plant-based degreaser for daily/weekly use.
Heavy-duty backup: An alkaline degreaser (pH 10–12) for polymerised grime—use sparingly and follow label directions.
Tools that work: Microfiber cloths (loose weave for wiping, tight weave for polishing), non-scratch scrub pads, nylon brush, plastic scraper/old loyalty card, and a small detailing brush for corners and hinges.
Protection: Nitrile gloves and a simple mask if you’re sensitive to fumes.
Patch test first: Always test on a hidden spot—especially on painted cabinets, natural stone, or anodised finishes.
Tip 2: Range hood & filters—soak, don’t scrub forever
Remove filters and soak in a tub of very hot water with degreasing dish soap plus a splash of alkaline cleaner.
Agitate lightly with a soft brush; avoid bending mesh filters.
Rinse and dry completely before reinstalling.
Wipe the hood shell with a mild degreaser; polish stainless in the grain direction to avoid streaks.
Cadence: Monthly if you cook daily; every 6–8 weeks for lighter use. A clean hood slows down grease spread.
Tip 3: Hob, grates & burners—lift, don’t grind
Lift-off method: Loosen stuck-on bits with warm soapy water first; then apply degreaser and let it dwell 3–5 minutes.
Grates: For cast iron/enamel grates, soak in warm soapy water → scrub with a nylon brush → rinse → dry fully to prevent rust.
Burner caps & rings: Use a toothpick or pin to clear ports—never enlarge holes.
Glass hobs: Use a plastic scraper at a shallow angle, then a tight-weave microfiber to finish.

Tip 4: Backsplash (tile, glass, stainless)—master dwell time
Mist a light, even coat of degreaser and give it time (2–4 minutes) to emulsify oils.
Wipe vertical strokes bottom-up to prevent drips; follow with a water-damp cloth to neutralise residues.
Grout care: For greasy grout lines, use a pH-neutral cleaner most days; reserve alkaline cleaner for spot treatment only.
Stainless steel: Wipe with the grain, then buff dry to finish.
Tip 5: Cabinets & handles—emulsify → lift → neutralise → protect
Door fronts & edges: Atomise cleaner onto the cloth (not the door) to avoid saturation, especially on MDF/laminate edges.
Handles & rails: Use a detailing brush around screws and seams; wipe dry immediately.
Hinges: Degrease gently, then dry thoroughly to avoid creaks.
Protective finish: A light application of mineral oil on bare wood or food-safe surface conditioner on laminates helps grime release next time.
Tip 6: Countertops—respect the material
Quartz/solid surface: Most mild degreasers are fine; avoid abrasive pads.
Natural stone (marble/limestone): Skip alkaline or acidic cleaners—use pH-neutral only, and blot spills fast to avoid etching.
Stainless worktops: Degrease lightly, rinse cloth often, then polish dry to prevent water marks.
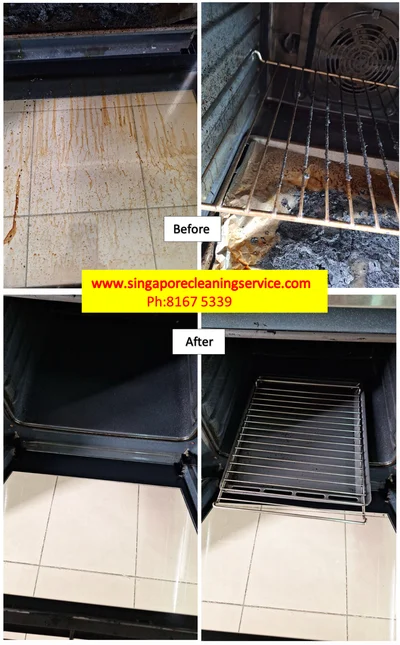
Tip 7: Ovens & air-fryers—beat polymerised oils
Warm the cavity slightly (40–50 °C) to soften residues, then power off.
Apply gel or paste degreaser on baked-on spots; let dwell as directed.
Racks & trays: Soak in hot soapy water with a splash of alkaline cleaner; use a non-scratch pad.
Air-fryer baskets: Many are non-stick—stay gentle; avoid steel wool.
Rinse thoroughly: Leftover cleaner can smoke during the next use.

Tip 8: Small appliances & fixtures—work top-down
Kettle, rice cooker, blender base: Degrease exteriors with a lightly damp cloth; avoid liquid getting into vents.
Switches & sockets: Spray onto the cloth, not directly.
Lighting & undershelf rails: Wipe first before you clean surfaces below; otherwise dust and grease will fall onto freshly cleaned counters.
Tip 9: Floors—no more slippery residue
Double-bucket method: One bucket with correctly diluted cleaner, one with clean rinse water.
Mop sequence: Pre-vacuum → damp mop with cleaner → rinse mop in clean water → final pass with plain water.
Anti-slip check: If floors still feel slick, you likely overdosed detergent; rinse again with clean water only.
Tip 10: Fabric & soft surfaces—don’t forget these grease magnets
Hood filters (carbon pads), curtains, floor mats: Wash or replace on schedule.
Microfiber cloth care: Hot wash without fabric softener; air-dry to maintain grabby fibers.
Range hood charcoal filters: Replace per manufacturer guidance; a clogged filter redeposits grease around the room.
Tip 11: A realistic maintenance plan for busy households
The 5-minute daily reset
Wipe hob and adjacent counter after dinner while the surfaces are still warm (oils lift easier).
Quick swipe on cabinet handles and backsplash splash zone.
Rinse cloths and hang to dry so they don’t smell.
The 20-minute weekly mini deep-clean
Wipe hood shell, scrub around burner caps/igniters, clear crumbs under trivets.
Spot-treat backsplash grout and door edges.
Mop with proper dilution to remove film before it becomes slippery.
The monthly “hood day”
Soak and clean hood filters; detail clean handles/hinges.
Check air-fryer/oven trays and give them a soak if they feel sticky.
Quick audit: if anything looks gummy, schedule the hour this week to handle it before it hardens.
A solid routine keeps build-up from turning into a weekend project. If things have slid for months and you need a quick reset across the entire home, consider a one-time deep clean to bring everything back to baseline—then stick to the weekly rhythm so grease never has a chance to harden.
How to choose the right degreaser (and avoid damage)
Read the label pH and surface list. If the product says “not for aluminium or stone,” believe it.
Use the right pad. Microfiber or non-scratch sponge for most surfaces; magic erasers can dull glossy laminates—reserve for stubborn marks and spot-test first.
Rinse matters. Degreaser left behind keeps attracting dust; always follow with a water-damp cloth.
Smell test. Strong fragrance doesn’t equal strength; performance depends on surfactants and alkalinity, not perfume.
Do not mix chemicals. Especially bleach + acids or ammonia—the fumes are dangerous.
Grease prevention: small upgrades, big payoff
Splash guards: A slim, clear guard near the hob edge collects splatter and removes easily for cleaning.
Magnetic utensil holders: Keep oily tools off the counter; they’re easier to wipe in one go.
Cookware lids: Use lids or mesh splatter screens when pan-frying.
Tray strategy: Bake or roast with a rimmed tray to prevent oil drips onto the oven floor.
Vent discipline: Switch on the hood 1–2 minutes before cooking; keep it running 5–10 minutes after.
Post-renovation or handover scenarios
New keys or a fresh reno often leave a mix of fine dust and greasy residue—grit that turns into paste when wiped wet. In those cases, dry-dust thoroughly, then degrease in sections. If you want everything reset in one go, a specialised move in cleaning service helps you start cooking in a truly clean space (filters, cabinets, rails, hinges, and hard-to-reach corners included). For homeowners who prefer to hand off periodic resets, comprehensive cleaning services in Singapore can manage the mess while you focus on work and family.
Cabinet-by-cabinet workflow (a simple sequence that works)
Empty the section you’re cleaning; place items on a clean towel.
Dry-dust to remove crumbs and spices.
Light spray on cloth (not directly on the panel), wipe top-down so drips don’t run into hinges.
Detailing pass with a soft brush in grooves and around handles.
Neutralise residue with a water-damp cloth; immediately dry with a second cloth.
Return items after they’re wiped clean of oil film.
Stainless, glass, and gloss finishes—how to keep them streak-free
Stainless: Degrease → water wipe → dry buff following the grain. For fingerprints, a tiny drop of mild dish soap on a wet cloth works wonders.
Glass backsplash: Use a degreaser first, then a glass cleaner or 1:4 vinegar solution for the final polish (skip acids on stone areas).
High-gloss laminates: Minimal pressure, non-abrasive cloth, and short strokes. Over-scrubbing causes micro-swirls that scatter light and look perpetually “hazy.”
The 3 signs you’re using too much product
Squeaky, tacky, or smeary feel after “cleaning.”
Rapid dust build-up within a day or two (detergent residue is sticky).
Streaks that won’t buff out—usually leftover surfactant film.
Fix: reduce dosage, rinse more, finish with a dry microfiber.
What professionals do differently (so you can copy it)
Section mapping: Pros divide kitchens into logical zones and complete one zone before moving on—no half-done areas.
Right dwell time: They let chemistry work, then wipe—less elbow grease, better results.
Tool rotation: Degrease with one cloth, neutralise with another, dry with a third; cross-contamination stays low.
Edge care: Hinges, rails, and kickboards aren’t afterthoughts; grease hides there and migrates back.
When life gets too hectic, booking professional house cleaning services can restore that “like new” feel and set you up for easier weekly upkeep.
Useful Article To Read
- How to Get Rid of Sticker Residue: Safe Methods for Every Surface
- The Ultimate Guide to Post Renovation Cleaning in Singapore
- Top 9 Drain Cleaning and Unclogging Tips for Singapore Homes
- Simplify Your Life with a Weekly Cleaning Routine
- Top 10 House Cleaning Singapore Smart Tips for Everyday Home Care
- Renovation Cleaning Expectations vs Reality in Singapore Homes
- How Far in Advance Should I Book a Cleaning Service Appointment?
- Top 7 Post Tenancy Cleaning Benefits for Singapore Residents
- One-Time House Cleaning Service | Sparkling Home Solutions
- Top 10 End of Tenancy Cleaning Do’s and Don’ts (Singapore Guide)
- Top 10 Spring Cleaning Service Tips For Singapore Residents
